


Get help your way
How do I find my Model Number?
Do you have the original packaging?
-
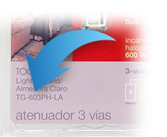
If your product came in plastic packaging (a clamshell), you’ll find the model number on the front of the insert card, on the lower left corner. If your product came in a box, you’ll find the model number on the top of the box.
Most model numbers are 12-16 characters and start with a couple letters followed by a dash.
No packaging? No problem!
-
The product number is on a label on the side of the dimmer or switch.*
If you’ve already installed the dimmer/switch, turn off the electricity and then remove the wallplate. Unscrew and remove the wallplate adapter, then unscrew the dimmer/switch and pull it out of the wall until you can see the label.
*Please note: The product number for Ariadni/Toggler dimmers is not on a label. It’s located directly on the front of the dimmer on the top left, or right below the on/off toggle.

- Browse Components
-
If you don't know your model number, try browsing for it here
If you don't know your model number, try browsing for it here
-
MyRoom


-
Can I run the low voltage wire in the same conduit as the line voltage wire?
This answer often depends on local codes and the capabilities of the ballast/driver. Local codes that allow Class 2 wiring to be run as Class 1 will call out the requirements for reclassification, such as adding Class 1 labels over the Class 2 markings. However, running the 0-10 V signal as Class 1 wiring does introduce some concerns, including noise / interference caused by coupling between the line voltage and low voltage wires. This noise / interference can cause a voltage fluctuation on the 0-10 V wires which can create a difference between the light level requested by the control and the light level signal being received by the ballast / driver. For more information on 0-10V applications, check out our 0-10V Application Note.
Was this FAQ helpful?Thank you! We appreciate your feedback! -
Can I wire the sensor to a power pack along with a 0-10V dimmer?
You can do this, however, it is important to note that if the switch is in the OFF position, the occupancy sensor will not be able to turn the lights on automatically. For more information on this setup, check out our short description on Application Note.
Was this FAQ helpful?Thank you! We appreciate your feedback! -
How far away can I place this sensor from the master controller?
Wireless devices can communicate to the master dimmer from 30' away through walls and from 60' away if you have line-of-sight.
Was this FAQ helpful?Thank you! We appreciate your feedback! -
How far can I run 0-10V wire?
Many variables affect how long you can run a 0-10V circuit. These include the number of ballasts/drivers, the source rating of each ballast/driver, the gauge of the wire, any noise on the wire run, and what voltage drop will allow the control to maintain a minimum light level.
Due to this number of variables, we can't provide a number that can be used in all applications. However, you can calculate the expected voltage drop for a given distance. Learn more at our 0-10V Application Note.Was this FAQ helpful?Thank you! We appreciate your feedback! -
How far from the dimmers can I use my Pico remote?
A Pico remote will work at least 30 feet away from any dimmer paired with it, and will work through walls, furniture, or other obstacles in your home. (The open-air range may be much further than 30 feet.)
Was this FAQ helpful?Thank you! We appreciate your feedback! -
Where is the best place to install this sensor?
For help picking the best place to mount your sensor please refer to page 3 of the specification guide.
Was this FAQ helpful?Thank you! We appreciate your feedback! -
Where can I find maximum wire run distances, device count limits, and other system specifications?
Refer to the HomeWorks section of the System Rules Document (pages 6-7). You can also log in to your myLutron account and visit the Service and Support section of lutron.com. There you will find Application Notes along with Product Specification Submittals.
Was this FAQ helpful?Thank you! We appreciate your feedback!