Please Read Before Installing
| WARNING: ELECTRIC SHOCK HAZARD. May result in Serious Injury or Death. Turn off power at circuit breaker or fuse before installing. | |
| CAUTION: Use only with permanently installed fixtures with dimmable screw-in compact fluorescent, dimmable screw-in LED, halogen, or incandescent lamps. To avoid overheating and possible damage to other equipment, do not use to control receptacles, motor-driven appliances, or transformer-supplied appliances. |
- Install in accordance with all national and local electrical codes.
- For indoor use only.
- Fully wrap 14 AWG/12 AWG (1.5 mm2 /4.0 mm2) wires around the screw and tighten, or strip insulated 14 AWG (1.5 mm2) wires to 1/2 in (13 mm) and insert into the push-in terminal.
- Tighten screw terminal securely to 5 in-lb (0.55 N•m).
Limited Warranty:
lutron.com/warranty. For a physical copy of warranty information, contact 1.844.403.1795 (Mexico: 1.888.235.2910).
Scroll down and click Accept to view installation information online, or click here to print an install guide. To receive a physical copy of the installation guide call 1.844.403.1795.

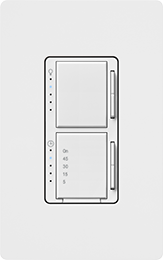
5-Level Dimmer / Timer
MACL-L3T251B
How do I find my Model Number?
Do you have the original packaging?
-
If your product came in plastic packaging (a clamshell), you’ll find the model number on the front of the insert card, on the lower left corner. If your product came in a box, you’ll find the model number on the top of the box.
Most model numbers are 12-16 characters and start with a couple letters followed by a dash.

No packaging? No problem!
-
The product number is on a label on the side of the dimmer or switch.*
If you’ve already installed the dimmer/switch, turn off the electricity and then remove the wallplate. Unscrew and remove the wallplate adapter, then unscrew the dimmer/switch and pull it out of the wall until you can see the label.
*Please note: The product number for Ariadni/Toggler dimmers is not on a label. It’s located directly on the front of the dimmer on the top left, or right below the on/off toggle.

Register to double your warranty period!
Walkthrough tutorial
Recommended method for first-time installers
Installation video
Step-by-step instructions on how-to install your dimmer.
Wiring Diagram
PDF wiring diagram
Instruction sheet
PDF instruction sheet
My Lights Do Not Dim Down Far Enough
How to customize the dimming range for specific LED lamps
Dimmer/Timer Doesn't Turn On
List of potential causes and recommended solutions.
My Lights Are Flickering, Buzzing, or Dropping Out
List of potential causes and recommended solutions.
My Maestro Dimmer Timer Indicator Lights are Blinking
List of potential causes and recommended solutions.
Is Someone Available at Lutron to Help Me?
Yes. Lutron specialists are available 24/7.
Technical support specialists are available 24/7
If you run into any trouble or have question on Lutron products, give us a call anytime at 1-844-403-1795 or email us at systemsupport@lutron.com
How to Optimize The Dimming Range
Adjust low-end dimming range after every installation or any time you change the bulb.
How to Use the Maestro Dimmer Timer
How to use your dimmer.
Adjust The Maestro Dimmer Timer Settings
Adjust frequently used settings
Warranty
Every Lutron dimmer includes a standard warranty.
Register your dimmer/timer
In exchange for your honest feedback, Lutron will extend the dimmer warranty for one year


